Recommendations
Now that you have downloaded the necessary technical requirements for the course, review the following recommendations to ensure the course runs smoothly and you have a successful session.
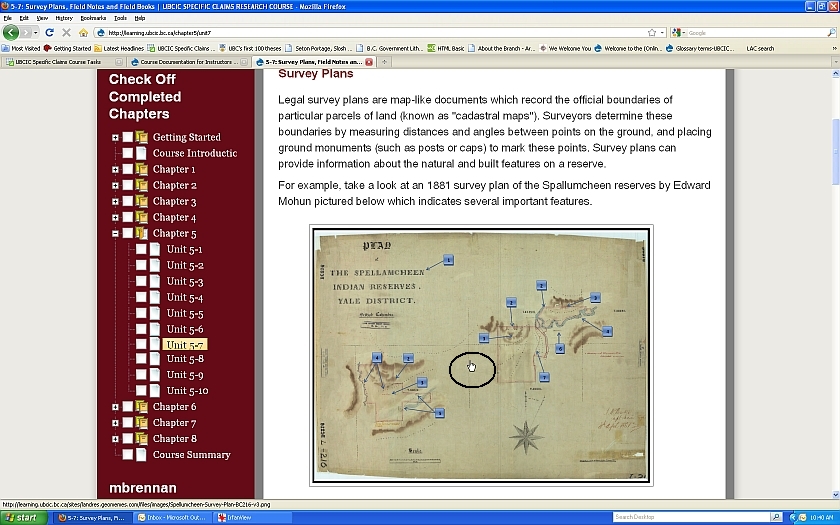
Clicking on a chapter heading will display all units in that particular chapter. Clicking on a chapter unit will take you directly to that unit. After completing a unit, check the corresponding box in the side menu to track your progress (see the arrow in Figure 1).
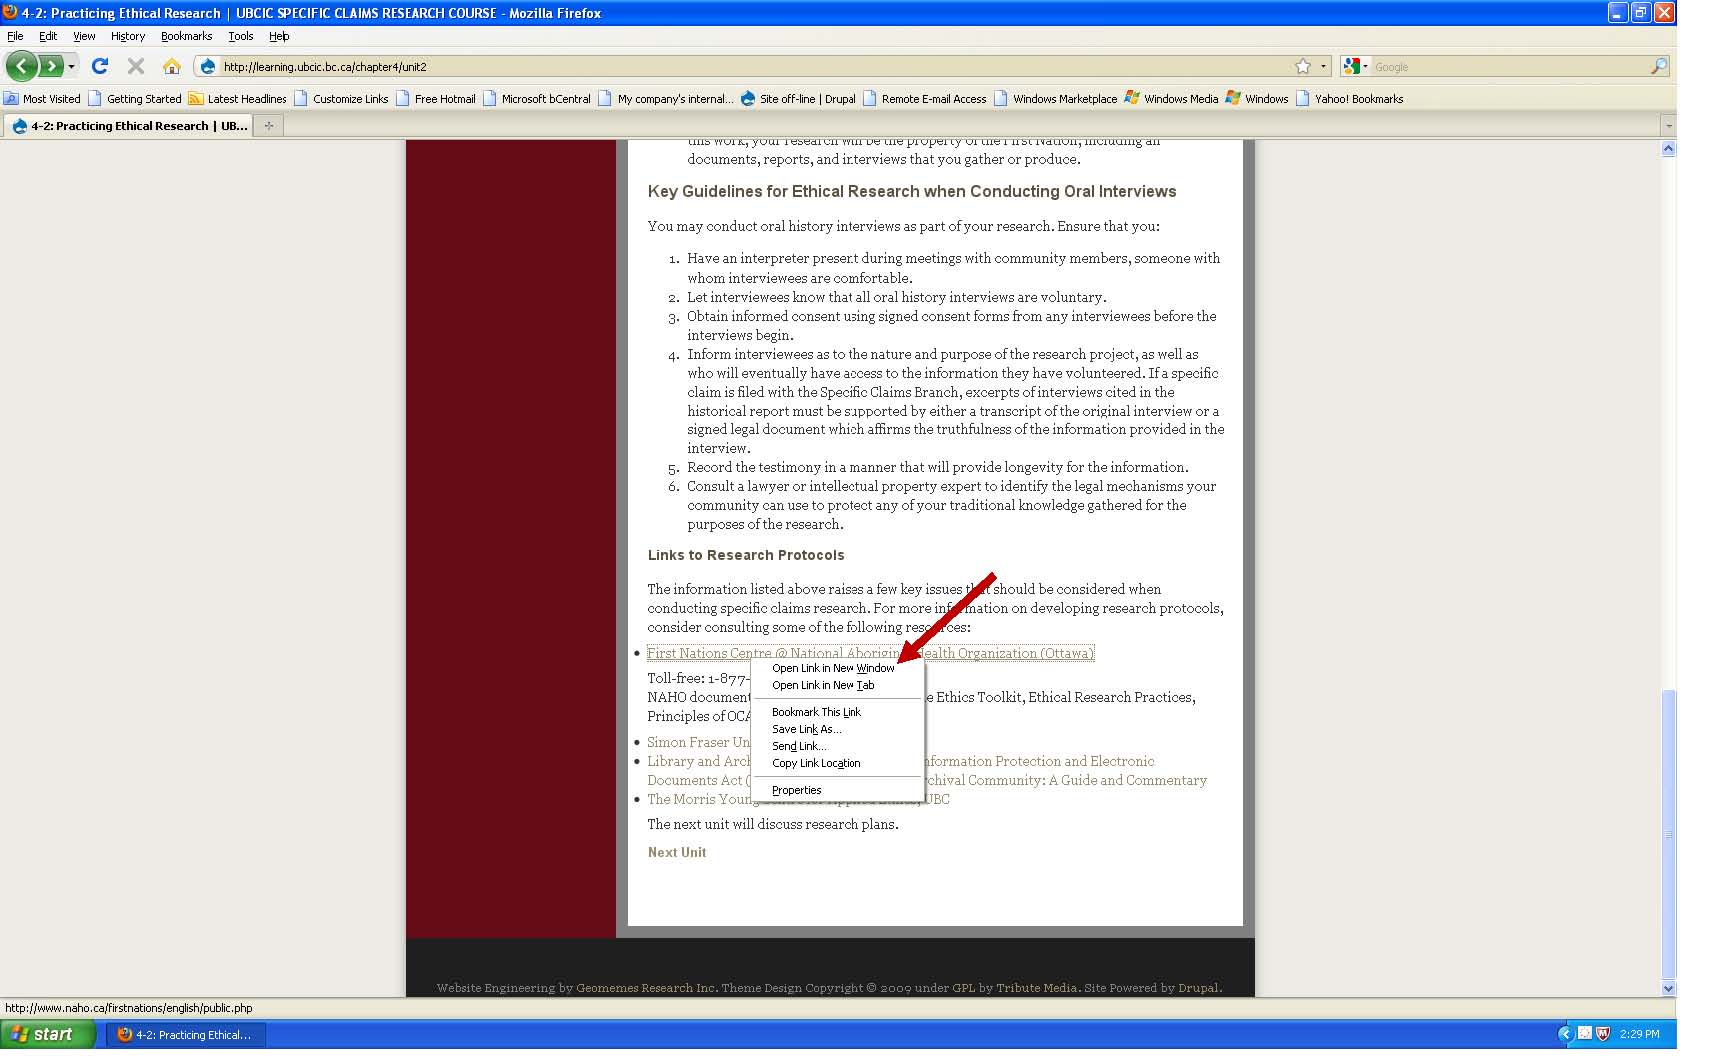
Throughout the course, you will be provided with links to external websites and be required to open document attachments. The links and attachments may, on occasion, replace the window in which you are working. If this happens, use your browser's "Back" button to return to the course. You can avoid this by opening website links and file attachments in a new window. To do this, right click all links and select "Open Link in New Window" (see Figure 2).
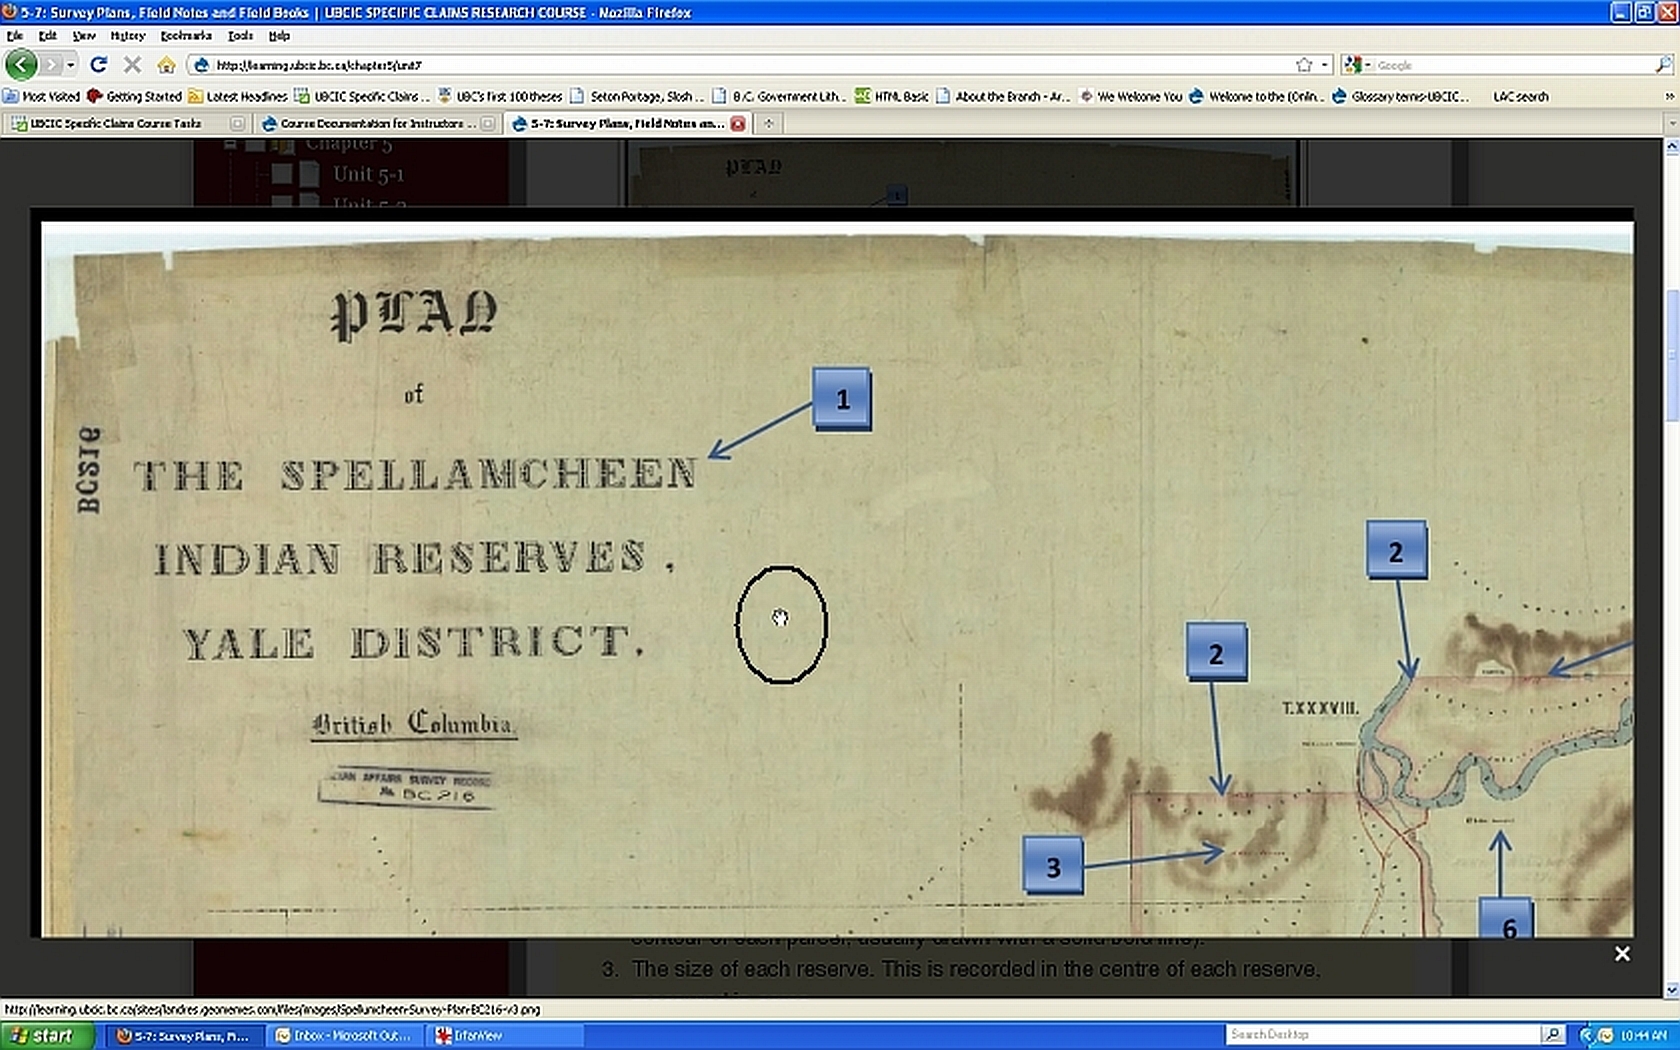
When an image is enlarged, explore it by left clicking and grabbing the white hand then dragging it to the area you wish to view (step 2). This procedure is also called panning the image. When you are finished viewing, click the X at the bottom right corner of the image:
To activate the document map feature, follow the instructions below:
Forgotten your password?
- Click ‘Forgot Password?’ at the top right hand corner of the Welcome page.
- Fill in your email address – the one you used to apply to the course – or your user name, and click ‘Email New Password’.
- You will receive an email with a link which will give you access to the site. Click this link.
- The link should direct you to the ‘Reset Password’ page. Click the ‘Log in’ button.
- This should redirect you to your own home account page where you will see a section for changing your password with two boxes; one for entering your new password and another for confirming the password you have just chosen.
- Enter your new password and confirm in the box below. make a note of your password for your records.
- Click the ‘SAVE’ button at the bottom of the page to save your new password and continue with the course.
Navigating Between Chapters and Units
The course website is designed to navigate in a linear way. At the bottom of each page is a link that will take you to the next unit in the course sequence. Navigation is also possible by using the side menu, which appears on every page. The menu permits you to see all the chapter headings.Clicking on a chapter heading will display all units in that particular chapter. Clicking on a chapter unit will take you directly to that unit. After completing a unit, check the corresponding box in the side menu to track your progress (see the arrow in Figure 1).
Navigating Between Windows
Throughout the course, you will be provided with links to external websites and be required to open document attachments. The links and attachments may, on occasion, replace the window in which you are working. If this happens, use your browser's "Back" button to return to the course. You can avoid this by opening website links and file attachments in a new window. To do this, right click all links and select "Open Link in New Window" (see Figure 2).
Improving Site Speed and Efficiency
While working in the course, close unnecessary programs running in the background to avoid slow processing time.Enlarging Text Size
To enlarge the text on your screen, follow the directions for doing so below: In Firefox:- Open Firefox.
- Click the "View" button located at the top left of your screen.
- Click "Zoom".
- Select the size that works best for you.
- Click the Chrome menu on the browser toolbar.
- Select Settings.
- Click Show advanced settings.
- In the "Web Content" section, use the "Font size" drop-down menu to make adjustments
Viewing Images
- Images in the course are in either jpeg or PDF format.
- Some image files are large and may take a few seconds to open.
- Images that open in PDF format may be saved to My Saved Resources for your own use once you have completed the course.
Enlarging Images
The majority of images used in the course may be enlarged to aid viewing. Click an image once to view a larger version in high resolution (step 1). Notice the white hand that appears when the cursor hovers over an image:When an image is enlarged, explore it by left clicking and grabbing the white hand then dragging it to the area you wish to view (step 2). This procedure is also called panning the image. When you are finished viewing, click the X at the bottom right corner of the image:
Viewing Videos
There are a number of video clips throughout the course. To avoid interruptions in the video stream, click the play arrow, then the pause feature, and wait several seconds. This will allow the video to load completely prior to viewing.Navigating the My Community Research Document
To help navigate the My Community Research document, we have created a document map, or index, to eliminate the need for scrolling through the lengthy booklet each time you are directed to proceed to a particular section. When the document map feature is activated, a list of headings appears on the left side of your screen. Each heading is electronically linked to its respective section of the booklet. By clicking on a specific heading, you will be taken to the corresponding section of the booklet.To activate the document map feature, follow the instructions below:
- Open the document My Community Research
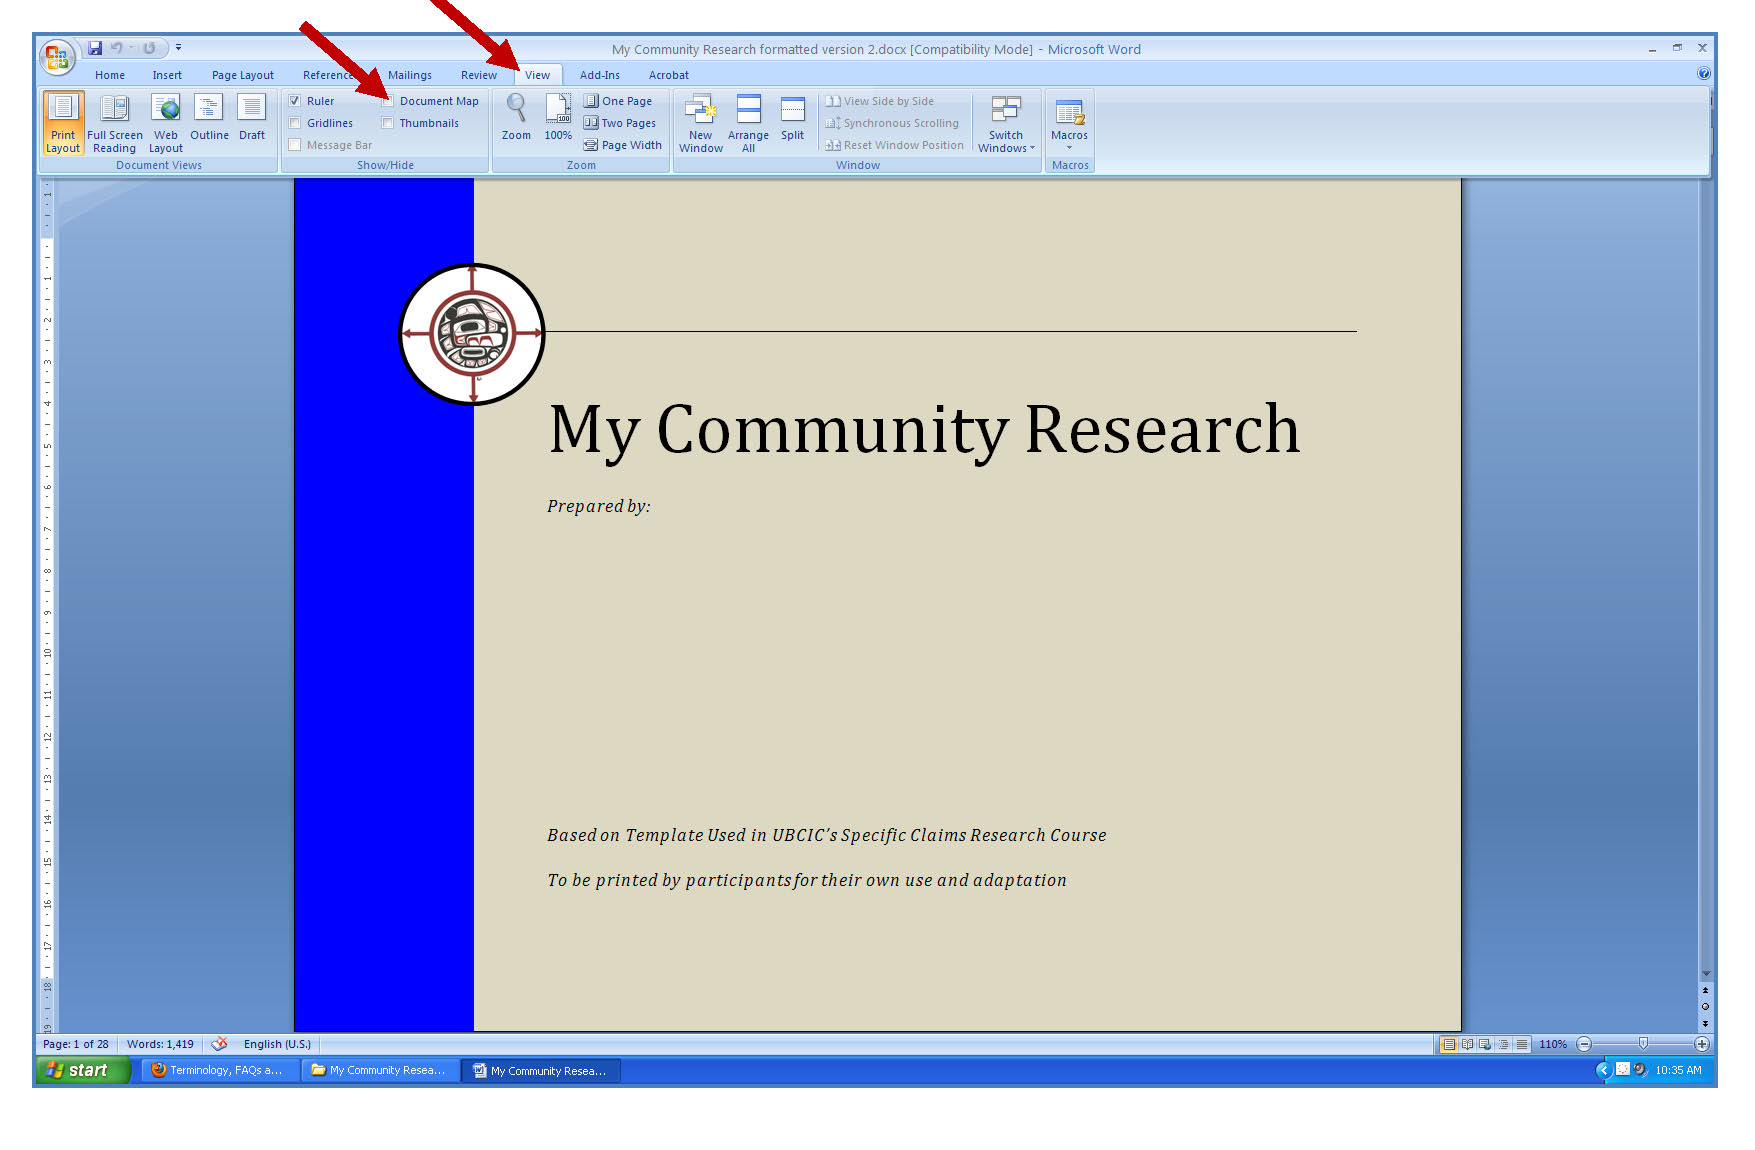
- Click the “view” tab or menu link. Next, click the “document map” box. View Step 2 at right to locate the tab and the box, both highlighted with a red arrow.
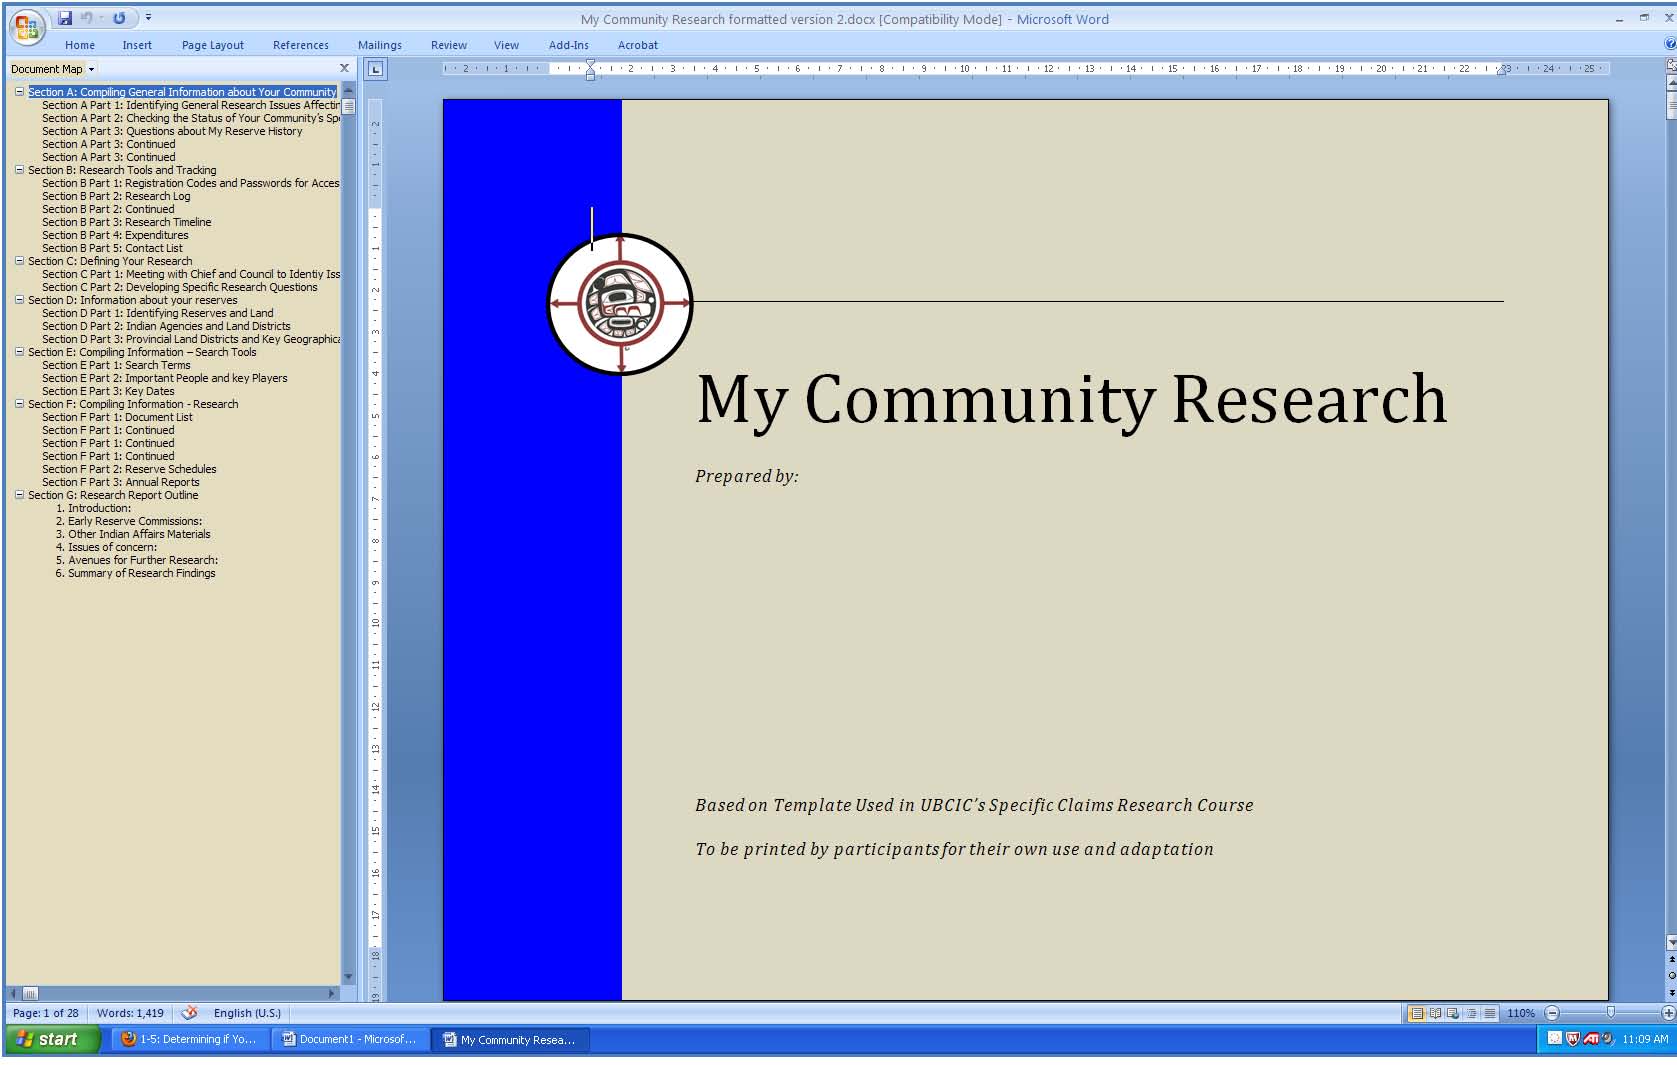
- When you have clicked on the "document map" box, the document map will appear as a list on the left side of your screen. It includes headings and subheadings contained in the document. View Step 3 at right to see an example.
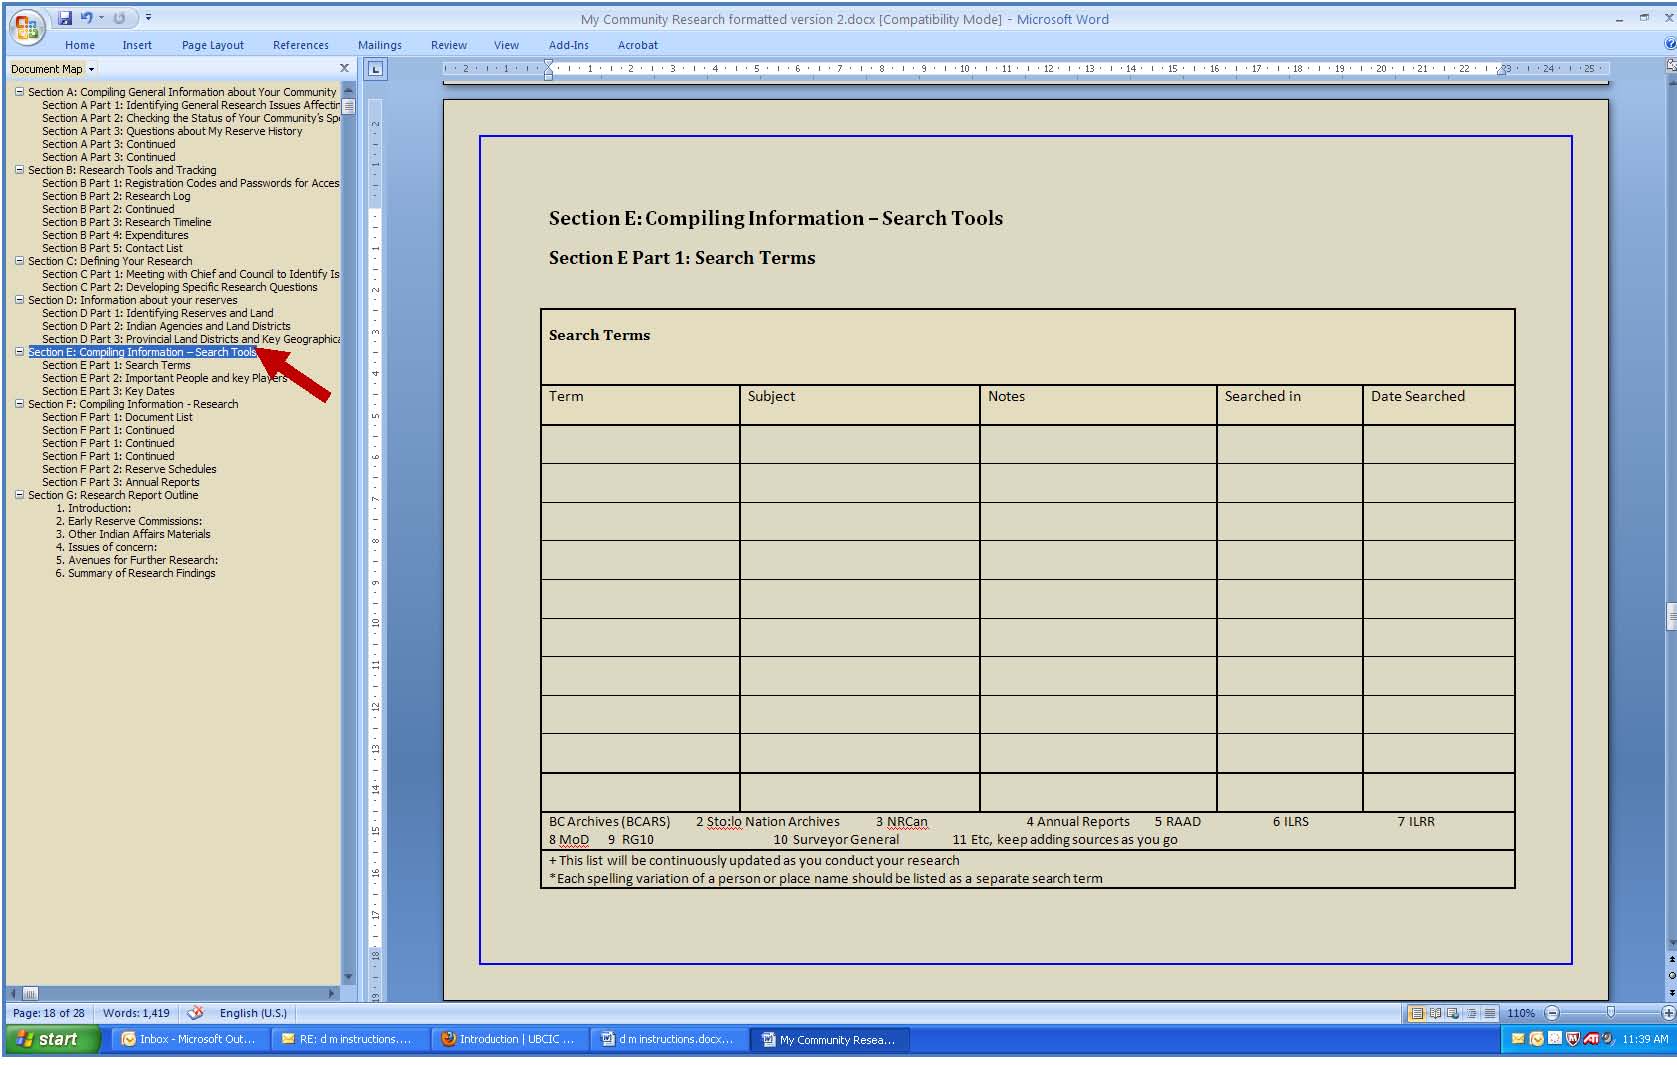
- Click any item in the document map list to go to that specific page in the document. View Step 4 at right to see an example.
How to Print a Course Unit Page
In Firefox:- Click "File" and then click "Print Preview".
- Click "Page Setup".
- Click "Shrink to fit Page Width".
- Click "Ok".
- Click "Print".
- Click the Chrome menu on the browser toolbar.
- Click "Print."
